
In order to get identity hiding forward secrecy the suggestion is to have the client change its static pubkey often in order to de-link VPN sessions, in the event of a compromise of the server’s static private key. “Often” might be a time limit, a bandwidth limit, and events like reboot of the system, the app, new WiFi, new DHCP lease, or explicitly by the user. To provide the same properties as OpenVPN it should be enough to change pubkey every time the user does a connect/disconnect.
u/j0n17
In addition, it is recommended to cyclically keep switching the VPN servers everyday. Rotating the public key as a feature has not been implemented yet. I shall update this guide when it is.
I wrote a tiny shell script that picks a random Mullvad Wireguard interface from a list and connects to it. For more information on what Wireguard interfaces these are, please refer this post first and this guide from Mullvad.
Step 1: Setup Dependencies
In all probability, you should have these installed by default.
1
$ sudo apt-get install iproute2 wireguard-dkms wireguard-tools
Step 2: Clone, setup and test
I prefer to keep my programs under /opt/. Though you could move it to any location you’d prefer as long as file permissions are set properly. The project is on my Github.
1
2
3
4
5
6
7
8
9
10
$ cd /opt/

# By default, the root group does not have write permissions on /opt. You'll need sudo access for executing this command.
$ sudo git clone https://github.com/ArcherN9/Wireguard-Interface-randomizer.git

# Usually, read and execution permissions for folders inside /opt/ are granted. If not, ensure that is setup first using chmod.
$ cd Wireguard-Interface-randomizer

# Use a text editor to modify/verify the parameters defined in the shell script first.
$ nano mullvad.sh
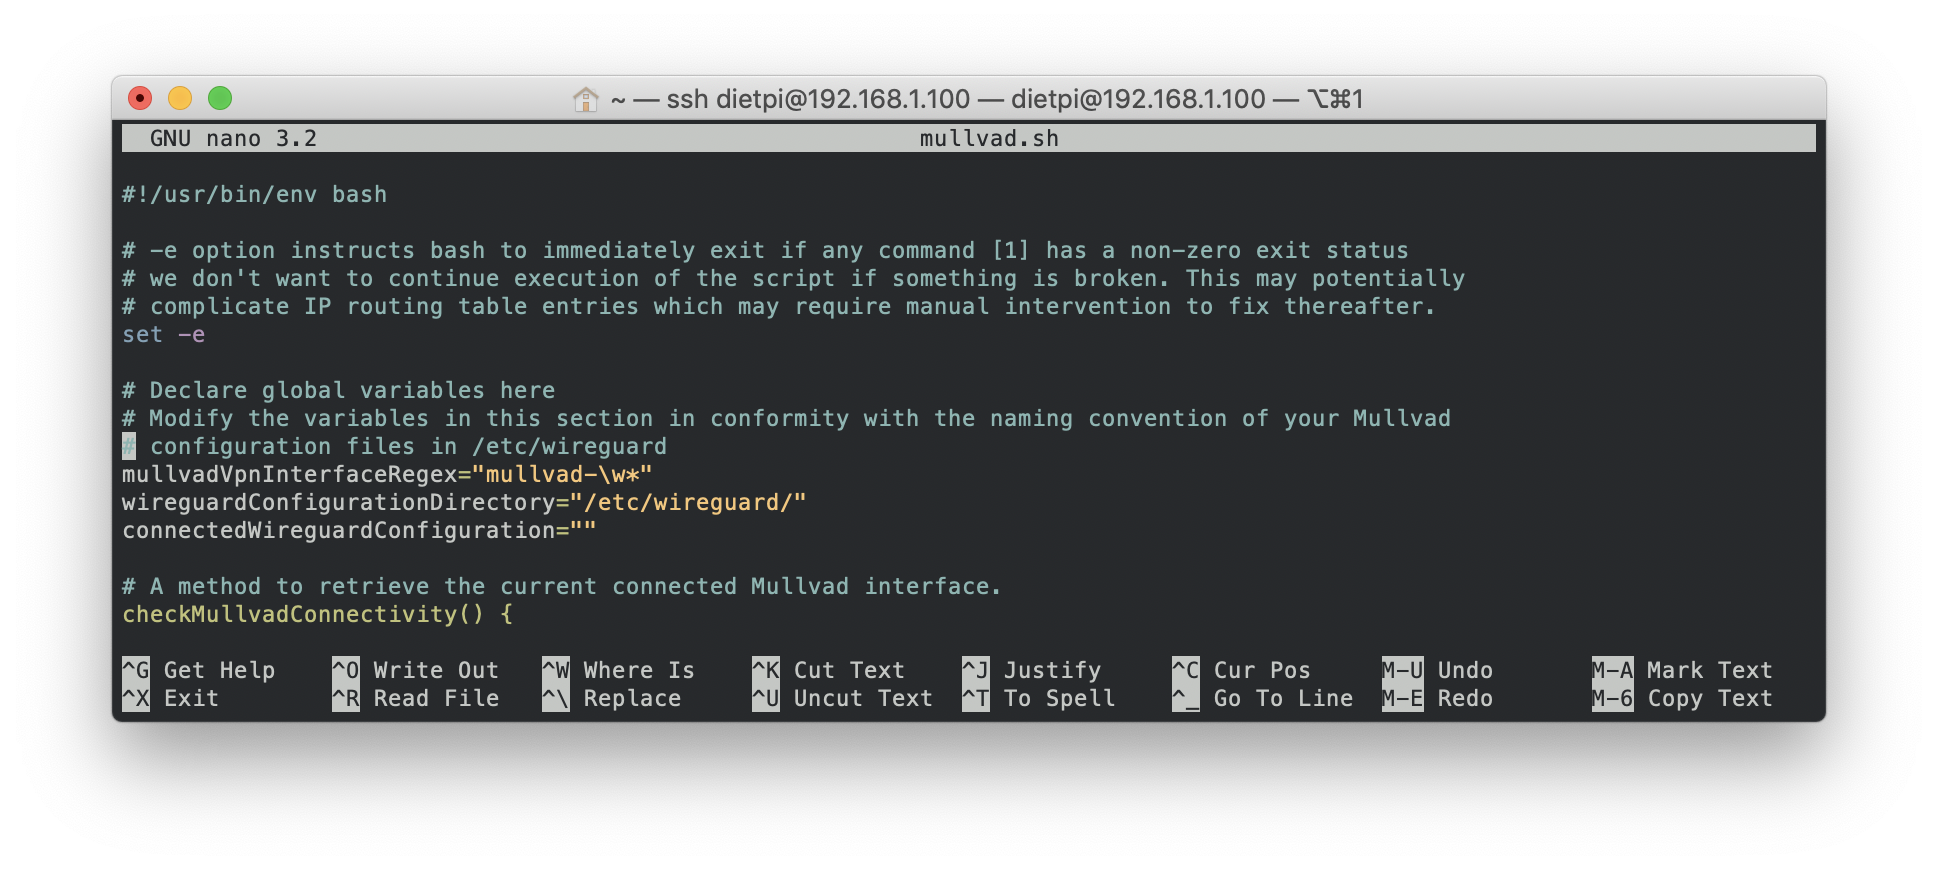
Verify the values of the following fields.
mullvadVpnInterfaceRegex
Default regex used signifies that all interfaces identified should start with
mullvad-and may end with any word. If this is not accurate for your setup, you may replace this with a regex of your choosing.
Pro Tip: Depending on your geographical location, you may setup the regex to ignore regions that are situated far away.
wireguardConfigurationDirectory
The default Wireguard directory where all wireguard interfaces reside. Highly unlikely that you may need to modify this; But if it is the case, please provide the absolute path where the Wireguard interfaces are situated.
Test if the script functions as intended.
1
2
3
4
5
6
7
8
9
10
11
12
13
14
15
16
17
18
$ cd /opt/Wireguard-Interface-randomizer
$ ./mullvad.sh

# If the script executes successfully, you should see an output similar to below
Cron is re-configuring the connected VPN.
System is currently connected to mullvad-lu1 and switching over to mullvad-us109.conf

# To alleviate skepticism, execute the following
$ ip a
...
5: mullvad-us109: <POINTOPOINT,NOARP,UP,LOWER_UP> mtu 1420 qdisc noqueue state UNKNOWN group default qlen 1000
    link/none
    inet x.x.x.x/x scope global mullvad-us109
       valid_lft forever preferred_lft forever
...

$ curl https://am.i.mullvad.net/connected
You are connected to Mullvad (server us109-wireguard). Your IP address is x:x:x:x::x
Step 3: Setup with Cron
DietPi
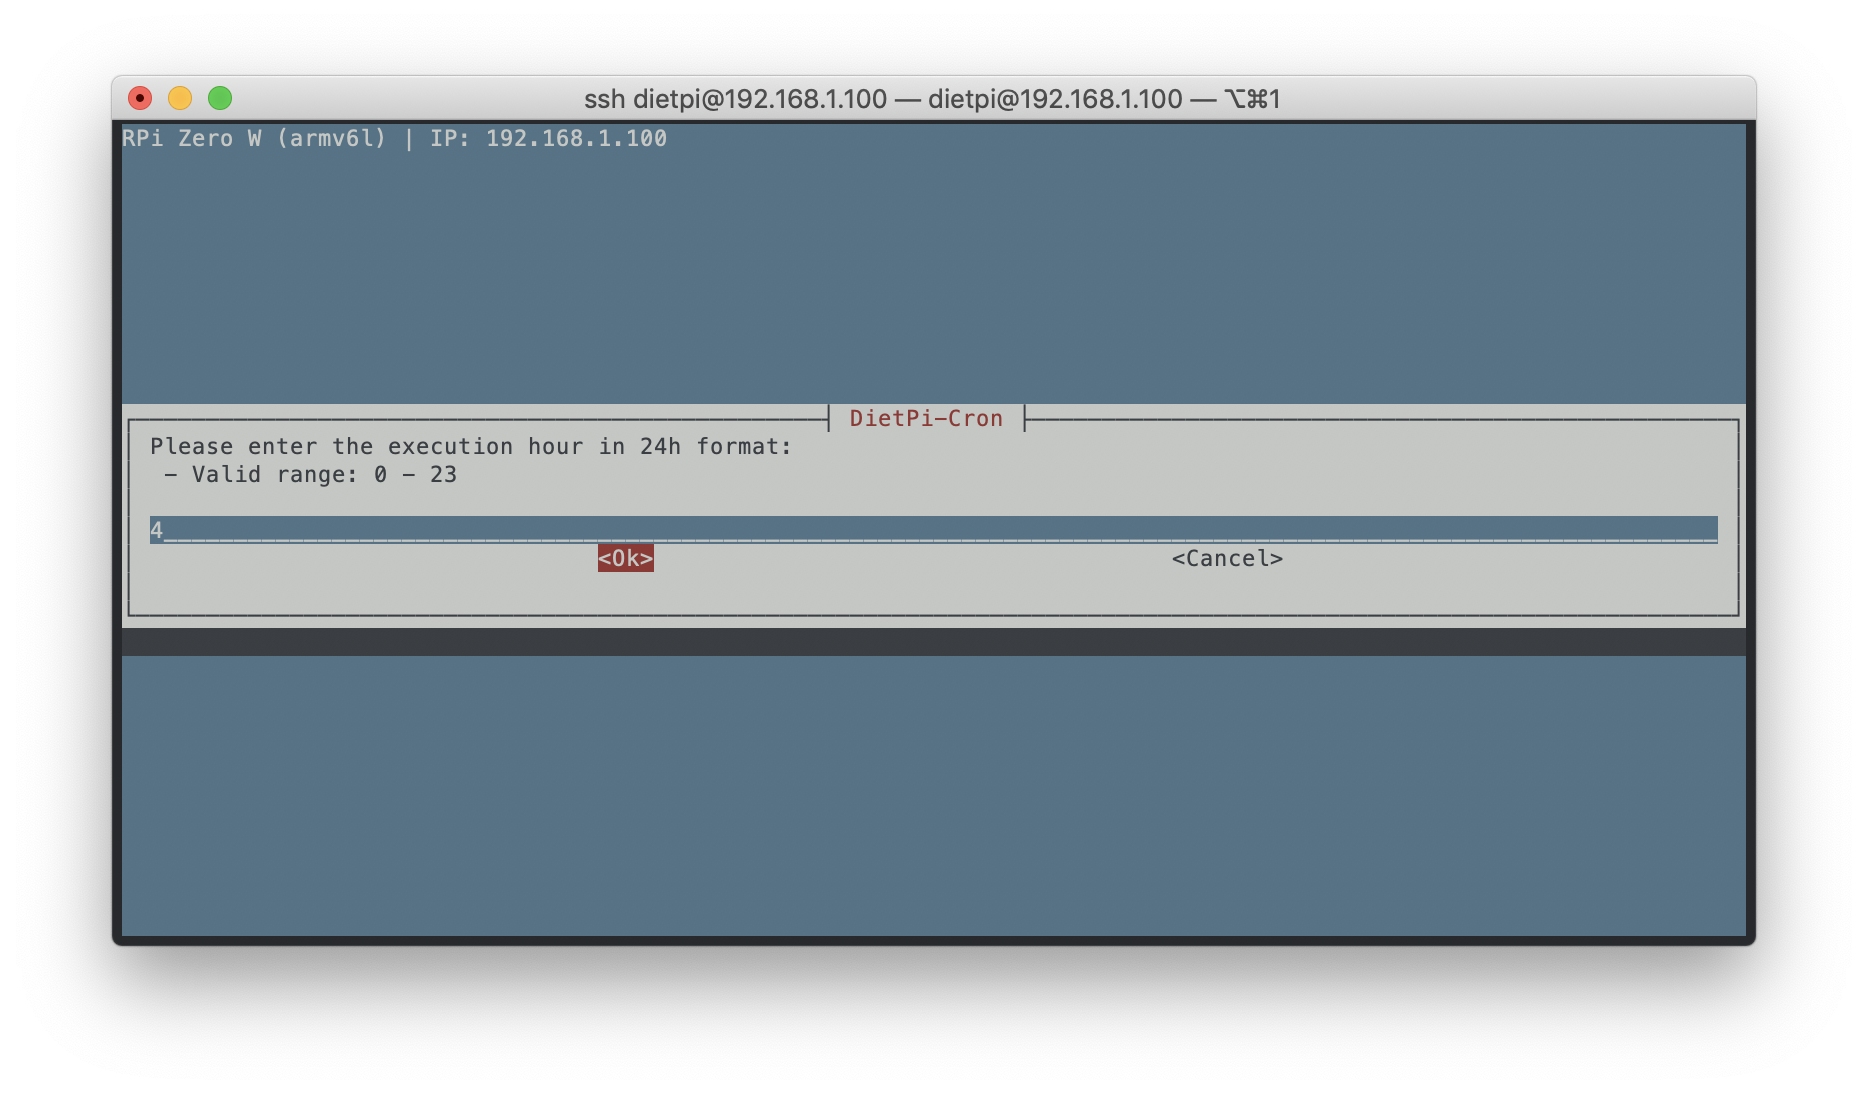
On a DietPi, a dietpi-cron utility is the simplest way to setup automatic rotation at a convenient time. Executing sudo dietpi-cron should open a similar window.
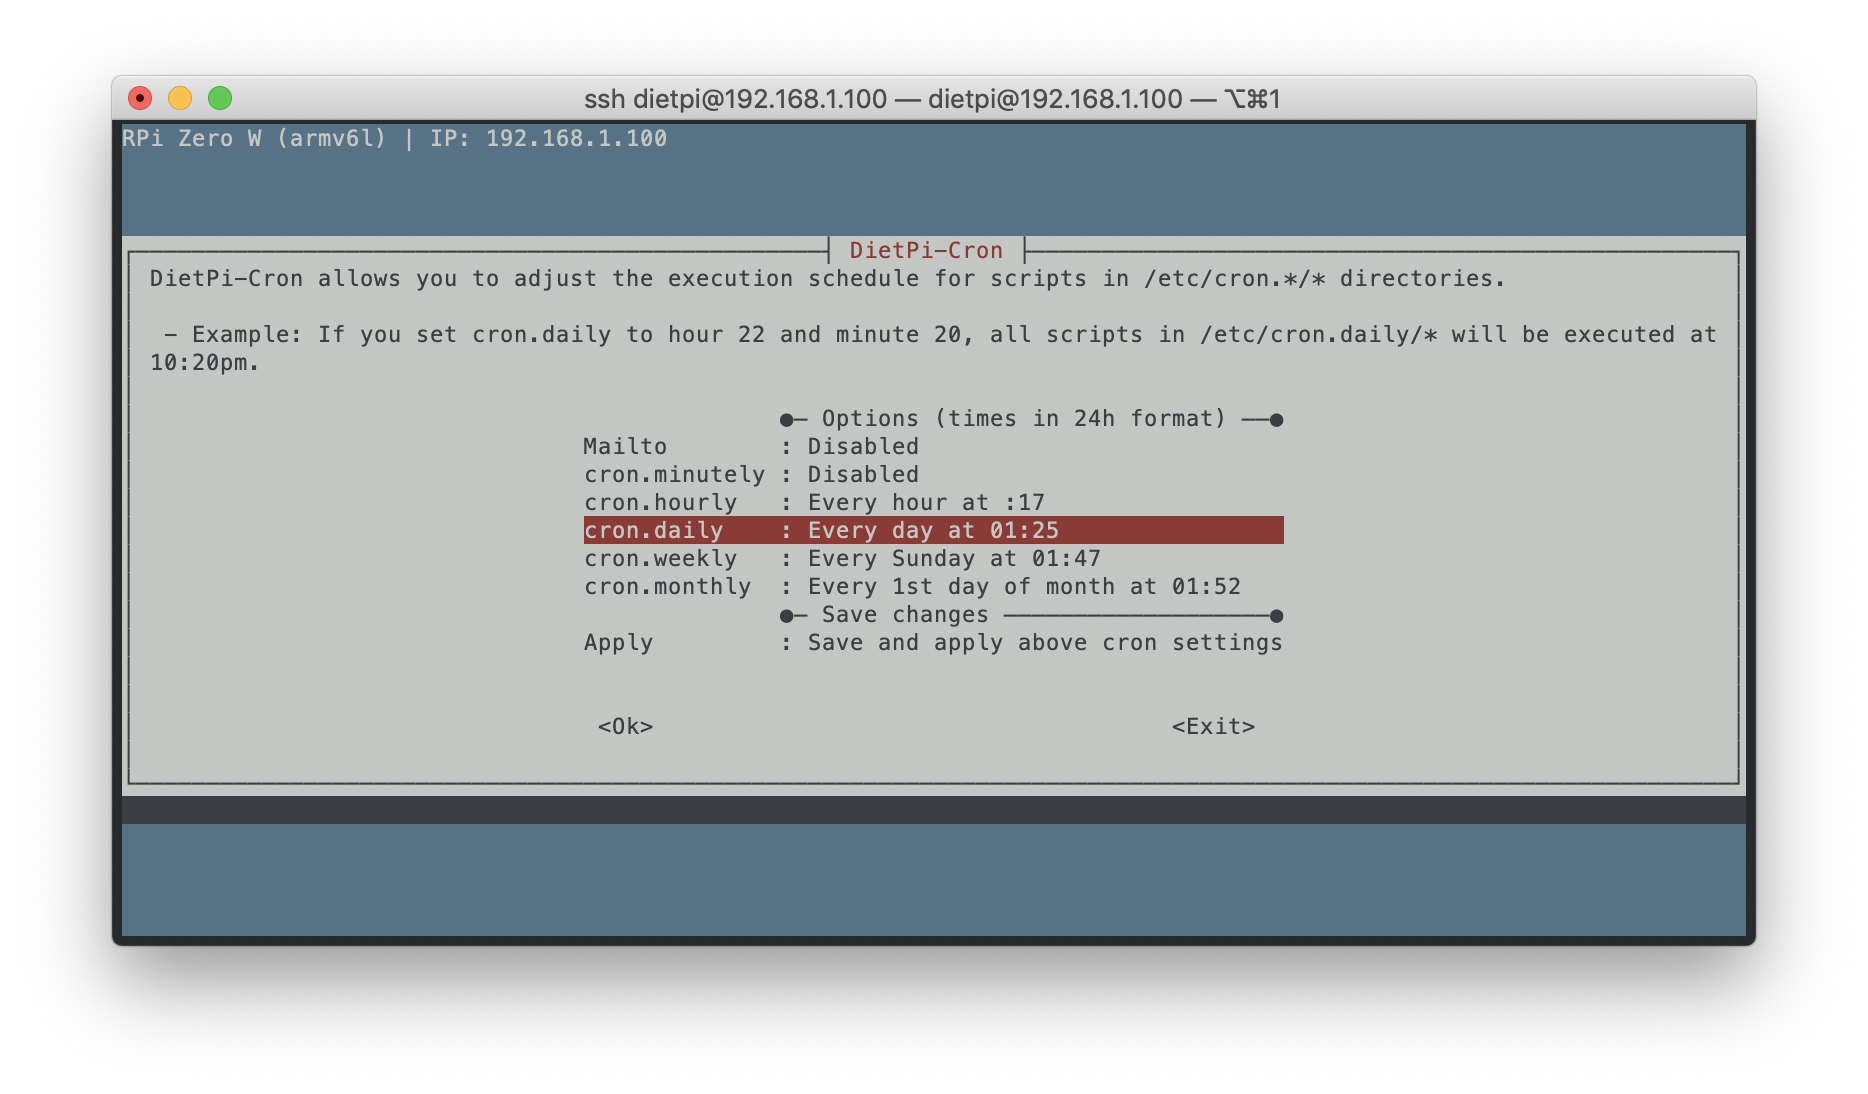
Select an appropriate cron type; I recommend Daily. Enter a preferred execution time in 24 hour format based on your schedule; I run mine at 0400hrs in the morning, everyday.
Select Okay and Apply on the cron home screen.
RaspberryPi OS
On a Raspberry Pi OS, either use your own crontab or root’s.
1
2
3
4
5
$ sudo crontab -e

# In the crontab, enter the preferred schedule
# Similar to the execution on DietPi, I've setup the execution of the script at 0400hrs, everyday.
0 4 * * * /opt/Wireguard-Randomizer/./mullvad.sh
You’re done.